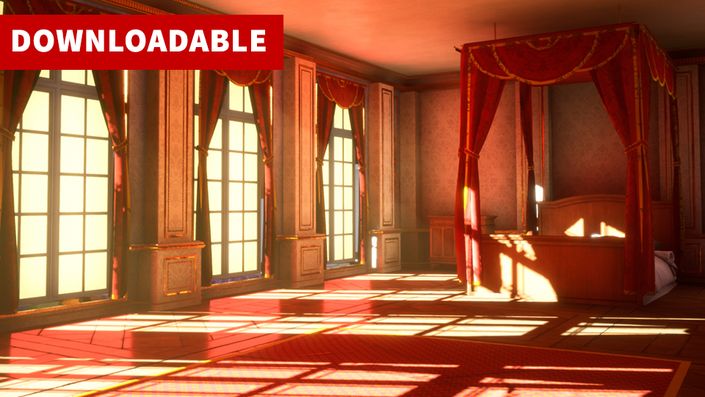
(DL) Victorian Era 3D Game Environment
Learn How to Create a Victorian Style Environment using 3Ds Max, Zbrush, Marvelous Designer, Substance & Unreal
Watch Promo
Instructor Info

Emiel Sleegers always had love for video games and when he was young, he started using Unity3D for programming but he found himself gravitating more towards the art of making games. Now he is currently working as an environment artist in Ubisoft. He contributed to creating AAA games such as Forza Horizon 3 and The Division 2. His all time favorite game is The Last of Us and that video game is what inspired him to want to work in the game industry. His advice for beginner artists is to focus on one aspect of gaming that they are passionate about, stick to it and get better at it. His hobbies include anything related to games or films, whether it be working on personal projects, freelance work or going out for movies.
https://www.artstation.com/emielsleegers
Course Info
In this course, we will go through the process of creating an amazing Victorian style game environment! We will start off by modeling the ornate pieces inside 3ds Max and then take them in Zbrush to enhance them. We will then model our modular pieces such as the pillars, the doors, the roof, the floor, etc. for reusing them in Unreal Game Engine. We will use Substance Designer to create a variety of tileable textures such as wood, plaster, gold, and fabric. We will explore different types of techniques such as high poly to low poly modeling and weight normal to low poly modeling to create our props in our scene. We will also utilize Marvelous Designer to create realistic cloth and drapery that will further solidify our environment. We will jump into Substance Painter to texture our props and once everything is looking good, we will setup our models and materials in the game engine. We will dive in creating lights and post fx that will set the mood for the overall Victorian Era game environment.
Victory3D
WHAT IS OUR MISSION
To provide students with affordable and substantial tutorials that are easy to understand and produce results. We believe that industry experience, effective teaching, and student engagement are the key ingredients for providing a high quality learning system.
Course Curriculum
-
Preview02-Creating The Atlas Part1 (24:37)
-
Start03-Creating The Atlas Part2 (22:08)
-
Start04-Creating The Atlas Part3 (29:35)
-
Start05-Creating The Atlas Part4 (29:52)
-
Start06-Creating The Atlas Part5 (28:44)
-
Start07-Creating The Atlas Part6 (23:26)
-
Start08-Creating The Atlas Part7 (25:59)
-
Start09-Creating The Atlas Part8 (28:18)
-
Start10-Creating The Atlas Part9 (15:06)
-
Start11-Creating The Atlas Part10 (29:25)
-
Start12-Creating The Atlas Part11 (29:37)
-
Start13-Creating The Atlas Part12 (27:00)
-
Start14-Creating The Atlas Part13 (28:08)
-
Start15-Creating The Atlas Part14 (27:28)
-
Start16-Creating the gold material (29:43)
-
Start17-Applying gold to our atlas (16:22)
-
Start18-Start creating our modular pieces part1 (26:59)
-
Start19-Start creating our modular pieces part2 (28:26)
-
Start20-Start creating our modular pieces part3 (26:18)
-
Start21-Start creating our modular pieces part4 (29:13)
-
Start22-Start creating our modular pieces part5 (26:51)
-
Start23-Start creating our modular pieces part6 (27:39)
-
Start24-Start creating our modular pieces part7 (29:27)
-
Start25-Start creating a second atlas (29:48)
-
Start26-Start creating a second atlas Part2 (29:25)
-
Start27-Placing our trims on the modular pieces (24:23)
-
Start28-Fixing uv errors and polishing our modular pieces (13:24)
