
Instructor Info
Pierre Rogers is a freelance artist with years of experience in hardsurface character design. When he is not in a 3d program creating unique and amazing hardsurface artwork, he is having fun making money hand painting bag toss boards. Most of his 3D/CG work has been featured in courses, lesson articles and reviews he had made for 3D Creative Magazine, 3D Artist Magazine, CGTuts+, Digital Tutors and Pluralsight.
Course Curriculum
Intro
Available in
days
days
after you enroll
Interface, Tools and Techniques
Available in
days
days
after you enroll
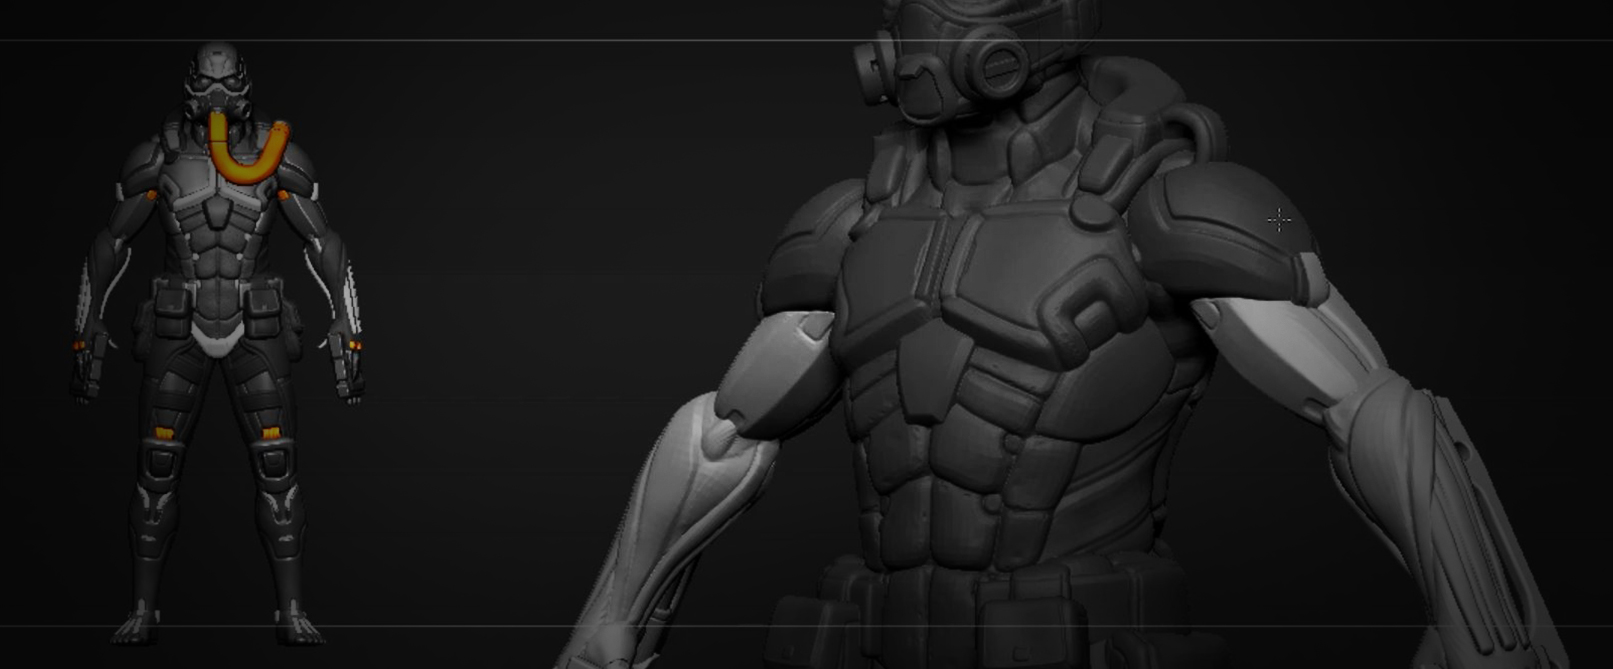
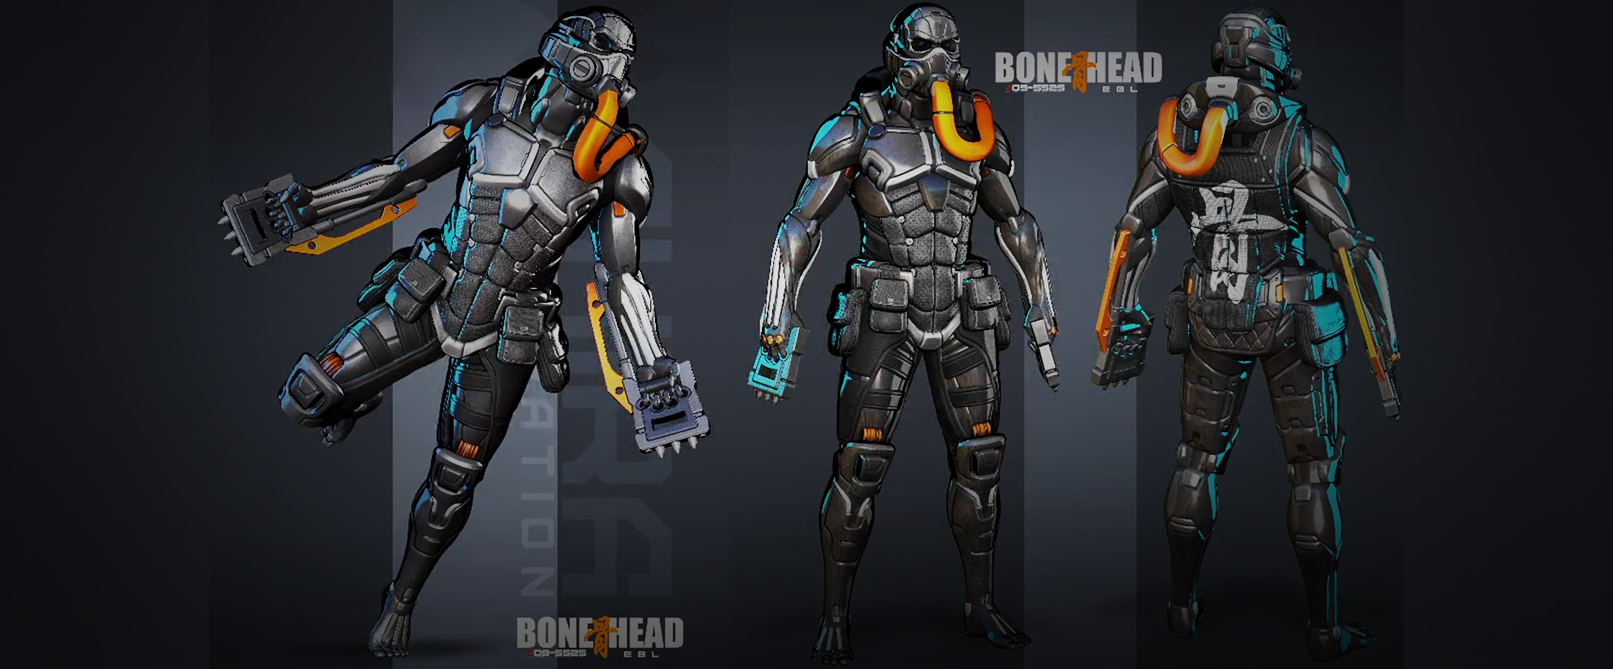
Sculpting & Modeling the Character
Available in
days
days
after you enroll
- 7-Blockout (25:24)
- 8-Torso I (20:44)
- 9-Torso II (15:39)
- 10-Accessories (16:46)
- 11-Arms (20:36)
- 12-Legs (10:09)
- 13-Legs II (23:29)
- 14-Feet (16:09)
- 15-Details (20:28)
- 16-Head Second Pass I (19:01)
- 17-Head Second Pass II (15:16)
- 18-Arms Second Pass (15:23)
- 19-Knuckles (15:04)
- 20-Knuckles II (17:02)
- 21-Revisions Prep (9:46)
- 22-Revisions II (16:37)
- 23-Revisions III (23:44)
- 24-Revisions IV (21:20)
- 25-Revisions V (19:19)
- 26-Revisions VI (11:33)
- 27-Revisions VII (26:01)
- 28-Revisions VIII (14:14)
- 29-Revisions IX (21:15)
- 30-Revisions X (16:41)
- 31-Revisions XI (20:42)
- 32-Revisions XII (22:28)
- 33-Revisions XIII (24:40)
- 34-Details I (21:07)
- 35-Details II (13:42)
- 36-Details III (20:26)
- 37-Cleanup I (20:01)
- 38-Cleanup II (18:02)
- 39-Cleanup III (14:29)
- 40-Cleanup IV (18:40)
- 41-Cleanup V (14:22)
- 42-Rebuild Subtools (8:04)
- 43-Materials (15:43)
- 44-Surface Details I (8:59)
Pose, Light, Render & Composite
Available in
days
days
after you enroll